Home
Woodworking
Hand Railings
Skirt Boards
Crown Molding
Bidding
Wainscoting
Chair Rail
Interior Doors
Closet Doors
Exterior Doors
Installing Doors
Baseboard
Installing Baseboard
Windows
Install Cabinets
Hand Tools
Power Tools
Blog
Contact
Link Partners
Tool Reviews
About Me
Can't Find Something?
Check The Sitemap
Site Map
Woodworking
Hand Railings
Skirt Boards
Crown Molding
Bidding
Wainscoting
Chair Rail
Interior Doors
Closet Doors
Exterior Doors
Installing Doors
Baseboard
Installing Baseboard
Windows
Install Cabinets
Hand Tools
Power Tools
Blog
Contact
Link Partners
Tool Reviews
About Me
Check The Sitemap
Site Map
[?] Subscribe To This Site


Baseboard Installation Tips
We can all benefit from baseboard installation tips. This is true even though installing baseboards seems to be an easy task and it is.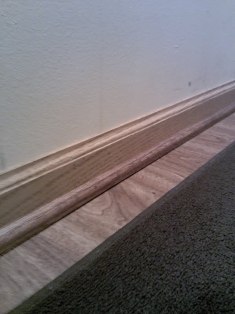
Installing the baseboard on the longest wall first is the most basic of baseboard installation. Measure the walls you are working on and take on the longest wall first.
If you have one piece of material that is longer than that wall, it is done in a single motion with a few nails and provides a starting point. If one end is an interior corner, run that piece of baseboard flush to the corner and miter the other end at 45 degrees for the exterior corner joint.
If you cannot use a single piece of material, it is advised to join the two pieces with a scarf joint that is fastened at a wall stud if you can. A scarf joint is simple.
Cut the ends of the two pieces of baseboard at 45 degrees where they meet and fit them together tightly, sometimes a 22 and a half degree on both pieces may work better; add some wood glue in there (watch for excess) and then fasten each side of the juncture with a single nail into the stud. If done right, the seam will be invisible and the fastening is secure. If you need to conceal the seam, use a little wood filler and sand it smooth.
Now start at the inside corner and cope the second piece into the corner. To cope use this coping method(coping basebord) and fit it flush to the first one. Then nail it in place. The result looks neater and tighter than a mitered inside corner joint.
One of the most used baseboard installation tips is use mitered joints at the outside corners.
To do this, set the new piece of material in place and let it overlap the corner. Mark your piece at the place where the two meet. Use a miter saw and cut the baseboard at 46 degrees. Fit the two ends together with a bead of wood glue and fasten to the wall with a nail at the corner and at the first available stud.
When all the baseboards are installed, go back and look for seams or gaps. If there are any seams or gaps, use wood filler and sand down carefully to make the finish smooth and silky.
The last of our baseboard installation tips is to apply caulking along the top of all the baseboards where the wall meets the trim. Be sure to use a wood tone caulking here and wipe off any excess or drippage. This may or may not be necessary depending on how true the walls are.
By using these and other baseboard installation tips, your jobs will all have a world class, professional appearance. The fussiest of customers will be pleased, too!
Return From Baseboard Installation Tips page to Home - Finishcarpentryhelp.com