Home
Woodworking
Hand Railings
Skirt Boards
Crown Molding
Bidding
Wainscoting
Chair Rail
Interior Doors
Closet Doors
Exterior Doors
Installing Doors
Baseboard
Installing Baseboard
Windows
Install Cabinets
Hand Tools
Power Tools
Blog
Contact
Link Partners
Tool Reviews
About Me
Can't Find Something?
Check The Sitemap
Site Map
Woodworking
Hand Railings
Skirt Boards
Crown Molding
Bidding
Wainscoting
Chair Rail
Interior Doors
Closet Doors
Exterior Doors
Installing Doors
Baseboard
Installing Baseboard
Windows
Install Cabinets
Hand Tools
Power Tools
Blog
Contact
Link Partners
Tool Reviews
About Me
Check The Sitemap
Site Map
[?] Subscribe To This Site


Installing Crown Molding
One of the more apparent situations where you might see crown molding is installed at the tops of kitchen cabinetry. Another place is at the top of walls where a wall meets the ceiling. Both applications add character and do a good job of dressing up a room. Here are a few quick tips for installing crown molding that will help if you have never done a project like this.
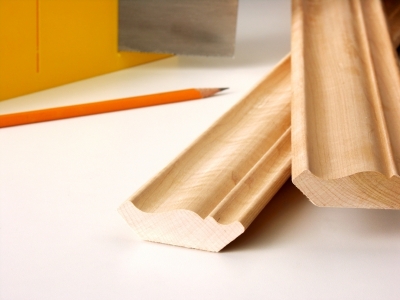
The Profile
Crown molding is not as difficult as it seems. One key thing to remember is to hold the molding on the miter saw the same way it gets nailed up and installed. What this means exactly is: crown molding will have a flat section of the profile on the bottom of the molding that is nailed flat against the wall or cabinet. This flat section has to be held flat against the fence on your miter saw.
Some finish carpenters will disagree with this because there are other ways to cut crown molding but I have learned that this is the easiest and best way for inexperienced people. The only draw back to this method is being able to hold the molding securely against the fence the way it gets mounted. If it is not exact, the angle changes at the cut slightly and an open miter at the corner is the result.
Coping Crown
For inside corners there are two ways to get through the corner. One way is to run the first piece into the wall or corner flat and even just as if the crown molding would end right there. Then use the coping method to take off from the corner.
This is a neat looking corner and provided you took your time and made a nice cope it will flow through the corner as if there wasn't a joint.
Inside Corner
The other way is to cut the inside angle on both pieces and to butt them together at the joint. There is nothing wrong with this type of joint and if you find its easiest then use this method and keep the miter tight at the joint.
The trick here is to use the trial and error method. Cut yourself two short pieces of crown and let's say it's a 90 degree inside corner, try cutting two 45 degree inside angles too these short pieces and trial fit to see how they butt together at the joint.
Adjust the angle on the saw as necessary and keep trial fitting until the correct angle is set to achieve a tight miter with these short pieces. Then when you are confident the angle is correct cut the actual pieces of crown that will be installed.
Other Suggestions
Always use wood glue at the joints and the outside corner joints should be pinned together with small nails. It's easiest and quickest to be installing crown molding with some type of small nail gun. I use an 18 gauge nail gun for installing crown molding.
It's best to have someone helping for a project like this. Sometimes when installing this crown molding at the ceiling corner of a room the ceiling may have some uneven areas and the crown won't be tight against the ceiling.
One way to combat this is to caulk these areas with paintable caulk and it will look just fine as long as the gaps aren't too big. Installing crown molding is like any other thing, the more you do the better you get.
Easy to Install Crown Molding
Here is a new Easy(anyone can do) way of installing crown molding.
Cabinet Crown Molding
Information and tips for Cabinet Crown Molding.
Decorative Crown Molding
Information About Decorative Crown Molding.
Return From Installing Crown Molding to Home - Finishcarpentryhelp.