Woodworking
Hand Railings
Skirt Boards
Crown Molding
Bidding
Wainscoting
Chair Rail
Interior Doors
Closet Doors
Exterior Doors
Installing Doors
Baseboard
Installing Baseboard
Windows
Install Cabinets
Hand Tools
Power Tools
Blog
Contact
Link Partners
Tool Reviews
About Me
Check The Sitemap
Site Map


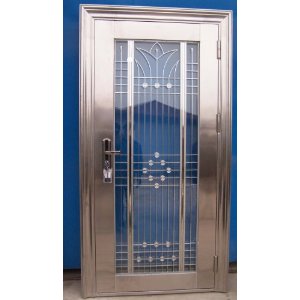
Exterior Door
Information for Metal Exterior Doors, Wooden Doors, Antique Doors and More
Installing an Exterior Door
Exterior doors are made out of some different materials.Whether it's a steel door, wooden door or even a fiberglass door, researching the different types is a huge advantage.
Some of the things to look for are energy efficiency, durability, and manufacturers warranties.
Price is also a big factor when choosing a door, almost everyone wants to get the most they can for the money so here again is where research would help.
I know a lot of people have certain doubts and questions concerning steel exterior doors.
Check out this page for information about these doors also some answers to questions you may have about metal exterior doors. Steel Doors
Thinking about a Fancy Wooden Exterior Door?
Check out this page for some history on colonial doors. 6-panel Doors
There are First Period English, French Colonial, Spanish Colonial, Dutch Colonial, German Colonial, and Georgian Colonial doors, all with their unique characteristics.
Here are some facts and information for antique doors. Some of these can truly be extremely nice but also expensive. Antique Doors
Installation
First I want to explain that these instructions of installing an exterior door is of a typical situation and will not work in every situation.
I have installed many doors of this type and almost every situation was just a little different.
There are some different variables to consider for this type of job and those variables most likely will appear when the old door is being removed.
The best advice I can give is to take your time and really pay attention to detail when you are removing the old door.
Another piece of advice is to be thorough with the job, check and fix any rotten subflooring or any other damage there may be.
Be sure the door is sealed up good after it is installed, finish the job totally inside and out.
By doing all of this you will get the long lasting performance out of this door that you would expect.
Installing an exterior door is not difficult but is a pretty good size job especially for those who have never done it before.
For those first timers I would recommend another person helping.
Let's assume you have chosen your new exterior door and have it home.
Starting out remove the old exterior door carefully so as not to damage the area around the door on the interior as well as the exterior walls. It is best to just take your time here and be really careful without forcing anything and easing out the old door slowly.
After you have the old door out inspect the rough opening and clean it up by removing any nails and checking the interior as well as the exterior doing the same. Keep the area where you are working clean and clutter free as possible to try and keep things moving along smoothly.
Check the rough framed opening for level on the hinge side and also the floor. It doesn't have to be perfect just relatively close, you do have some adjustment when installing exterior doors.
At this point I like to trial fit the exterior door in the opening to be sure it will go in easily.
If the door fits nicely pull it out and apply a generous bead of caulking across the opening on the floor.
Now set the door in the opening, the trick here is to set the door into the caulking without spreading the caulking around to try and get a good seal. Try to keep the new door in the exact same place as the old door to save you some work on the interior and exterior walls.
Check the door on the hinge side for plumb.
If the hinge side of the door is level then you can tack (without hammering all the way in yet) a few nails in through the brick mold on the outside to hold the door in place. I like to use galvanized headless nails for this. If the door is not level that means the floor is out of level and you will need to shim one side or the other at the bottom of the jamb leg to bring the hinge side plumb and the threshold level before nailing in.
If you need to make adjustments with shims at the floor this will no doubt mess up the seal, so squeeze in some caulking as best you can to get the threshold sealed back up before moving forward.
As you are working be opening and closing the door every time an adjustment is made to be sure things are not getting to far out of whack.
Once the door is plumb and nailed in, check to see how the door closes paying attention to the reveal around the door between the jamb and the door, it's usually about a 1/8 inch gap. Use shims at the hinge locations of the jamb to adjust.
Use 3" screws at the hinge locations to secure the door to the framing through these shims, usually 1 screw at the top hinge and one at the bottom is sufficient for an exterior door.
For the other jamb, shim as necessary most importantly by the strike plate and secure this jamb with either screws or the headless nails behind the door seal so they are not noticeable or exposed. Just push the seal back a little and fasten the jamb with these screws or nails through the shims and into the rough opening.
Be sure to keep checking to make sure the reveal stays nice and even and the door closes properly.
I like to shim and screw this jamb at least in three or four times in places evenly spread out.
The trick here is to not draw the jamb tightly to the rough opening without spreading it away from the door so it is critical to be paying close attention to your reveal and shimming evenly.
Now once you are happy and have the new door installed you may need to fill the gaps between the rough opening and the jambs of the door with insulation. I have found to do this is to use the proper expanding foam for this application.
There are a couple different types of this foam and if you use the wrong foam it could be disastrous so be sure to get the "LOW - E" expanding foam.
After you have sealed the door with this foam wait until it has set up and then take a knife and carefully cut off all the excess that may have expanded out.
With the exterior door installed now and all sealed up, you are ready to just apply the casing or trim out the inside and you are finished.
Install Screen Door Instructions
Step By Step Install Screen Door Instructions
The Basics to Interior Door Casing
Basic Information for Interior Door Casing
Return From Exterior Door to Home - Finishcarpentryhelp.com